
Hey guys! So this is going to be a little tutorial for all of you aspiring pony-to-be-s and I've been meaning to make one for a while now.. and I finally have the time! I'm happy to finally be back and going with everything... so thanks to everyone for their amazing support.

Now, this tutorial is going to be fairly easy and pretty cheap. The total that creating this came down to... $8 if you're including all the extra fees like shipping for materials. It's pretty easy. I ended up trying to make these for my amazing friend Emily.. but I just hope she'll be alright with them when she sees them in person. But.. moving on!
First things first.. here's what you'll need:


- Reference pictures or figurines
- hot glue gun (low heat or not; depends on personal preference) or any strong bonding glue would work


- Cup/bowl of water
- air dry paper clay (this should also work for any other air dry clays and also polymer clays but I would prefer not to work with those as they'd be too heavy; you can see later in this post that even using spackling caused problems for me in this project and how it stayed on my head)

And lastly, alligator clips! If you don't have alligator clips.. any sturdy hair clip that you believe works best for your hair/that you have laying around that would keep the ears up would work perfectly fine.

If you're dealing with a wig, you could also use the wire method. I've never done this to any of my wigs as I like to package them back up in their respective bags, but the gist of this is that when you're creating the ears, you'll shove some wire into the bottom of the ears. It should be about the same shape of the bobby pin that you see above, although it should be give or take a few inches longer. Placement of where the ears go are all on you. Afterwards, you can use the wire like twist ties and then tuck them over themselves or however you may see fit.

Moving on.. You want to take your clay out of the packaging. If you plan on making more with the clay that you have.. such as horns, marks, or any accessories.. you should buy more clay. A pack of clay from Daiso Japan usually can make only one pair of ears. Also, I should mention this now before I forget.. the clay that I'm working with apparently is around 2-3 years old. Although it's completely packaged, air dry clays have a tendency to do this. I had completely forgotten and it's what led this project to be more difficult than when I had originally made this with for my Rarity.

Now, you're going to take the clay out of the container and try to find the diagonal that gives both ears an equal amount of material to work with.
Then you can break it in half. Normally, it's super easy to go about this with your bare hands as the clay is super soft.. but due to the age of my clay, it was rather rough, creating an unequal distribution.

Next, you're going to take some water and then you're going to wet the clay if needed.

Start to shape and form the clay together so that there is an obvious triangle shape, similar to that of your reference pictures/figures.

At some point, your ears should look like the ones above. Keep in mind! You want to be working on both ears at the same time. It helps keep the process working better and prevents one set of clay from getting harder than the other. SO.. shape them around the same time and then move on to smoothing about the same time. If needed, you can take clay from other parts that you think don't matter to fill in cracks.


Now, as I had mentioned in the previous step, you're going to start smoothing your cracks and bumps with water. Continuously dip your fingers in water and smooth until you reach your desired look. While in this process of smoothing, you can also start to create the indentations that you find fitting. Remember: work on both ears about the same time. Doing this also helps prevent the clay from getting too "soupy" (this is what happens when you apply too much water when smoothing clay...creating large messes and turning usable clay to mush.)

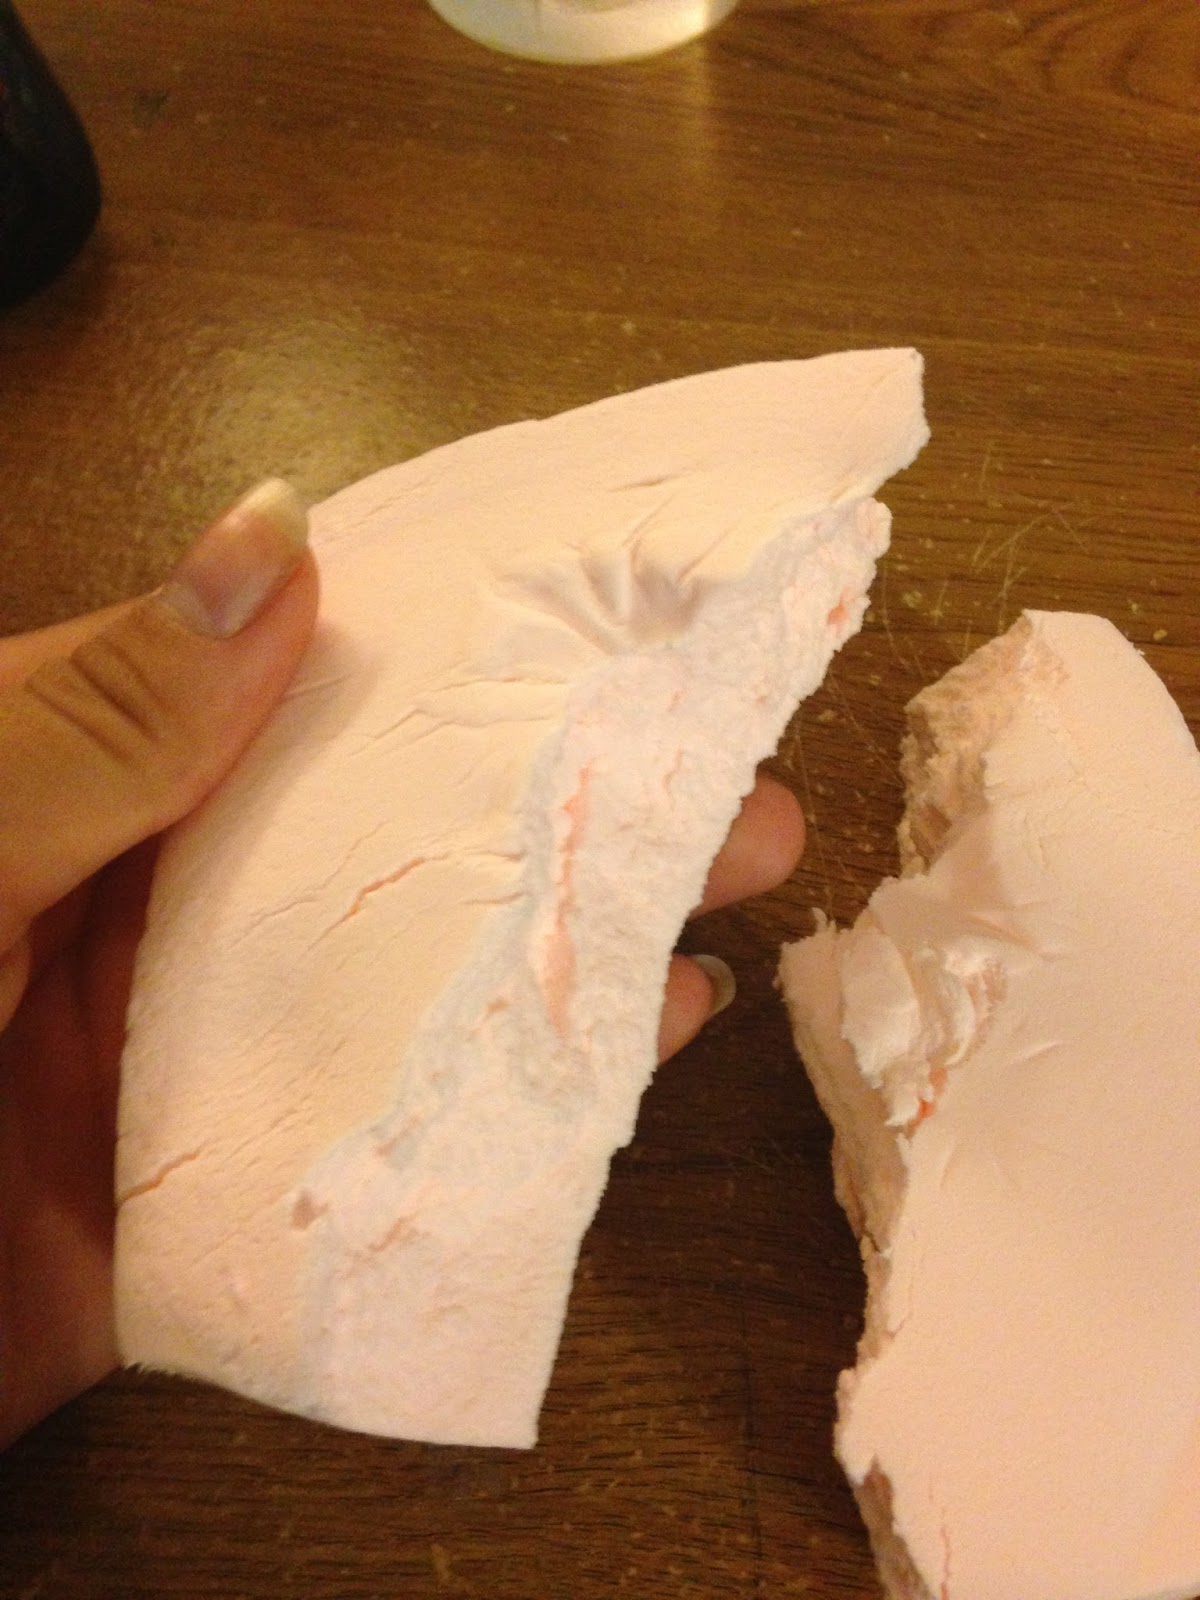
This is usually the outcome when you let your clay get too wet and soupy... but this is should be what your ears look like... although much, much smoother.

What they look like dry.


Although if you end up in a similar situation as I have, you might want to take some spackling and fill up all the cracks in the back. Warning: by doing this, you're making it way heavier in the back of the ears than they should be. Paper dry clay is one of the lightest clays so this created a problem with balance.

After, paint and work accordingly.


I had also tried my best to smooth out the back and also I took a razor to try and shave off any unnecessary bulges to the best that I could.

Now, glue it to your attachment.


Here's what they look like on. Although.. they normally look much, much nicer on wigs in my opinion.

Above is what it should look like if you're using the right materials and going about it the right way. For those wondering about the horn, I actually made it using polymer clay and painted it over using a porcelain paint to give it a shine (because magic). If you plan on going about making it with air dry paper clay, you'd want to take some aluminum paper, roll it up into two cone-like pieces, and then wrap them around each other like how you see I did above. After, take some air dry clay and squish it to have a large flat surface. Now cover the aluminum foil base completely in air dry clay. Smooth it out and shape it like so. Afterwards, you'll simply have to follow the gluing process that I went about with the ears!

I hope this tutorial was helpful to some of you! I know that there are artists out there that create these using resin and other what nots but I know that it can get incredibly expensive. This is simply a cheap alternative and it's fairly easy at that.. and you can have bragging rights to say that you made them when someone asks! If you end up using this tutorial, please drop me a link below or drop me a line/DM/hashtag/whatever to a photo of them or a photo of you wearing them. I'd love to see how it turns out!
No comments:
Post a Comment